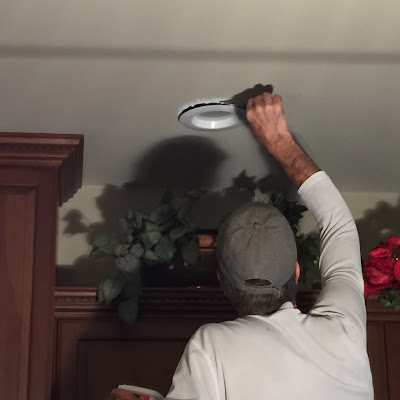
We just completed a major repair project on the ceiling in our kitchen and family room. It wasn't much fun, but it had to be done. We were "lucky" that we were snowbound for a few days last month and able to focus on the work so that Roger could complete it in record time.
Phase 1 - The New LED Lights
 |
| The gaps in some areas were 1/2 to 3/4 of an inch. |
The project began when we ditched the old halogen lights in the kitchen in favor of LED lights. It was easy for Roger to make the switch and the new lights are a big improvement, but as you can see, they didn't fit the holes exactly so he had to make cosmetic repairs.
 |
| Roger puts up a debris containment tunnel. |
The first step was to sand the ceiling around the perimeter of each light. Falling debris and some escaping dust particles are inevitable, but Roger created a series of "containment tunnels" to minimize the clean up.
 |
| Filling the voids in the ceiling. |
Next Roger filled the voids between the light and the ceiling with 3-M Patch Plus Primer. After it dried he added more where it was needed, sanded again and caulked the perimeter of the light to create a smooth transition to the ceiling.
As you can see, this is fussy work. There were eight lights to fix and some were quite challenging because of large gaps between the light and the ceiling.
 |
| Note that the rim of the light has gotten a first coat of the ceiling color so it will blend in. |
After Roger fixed the lights, he moved on to the next phase - cracks in the ceiling that were really bugging us.
Phase 2 - Repairing Some Cracks and Bad Taping
 |
| After the first of the two long cracks was repaired. |
We have an open plan and the kitchen ceiling continues to the family room. Two long cracks had appeared between the two areas from faulty sheet rock installation and bad taping, along with a couple of smaller ones. We could see the cracks coming and going, making invisible repairs very important to our peace of mind.
Fortunately Roger is an expert at solving difficult cosmetic problems, but I have to admit that fixing the cracks was an even bigger and messier job than Phase 1. It meant a major disruption to our lives for a few days, but it was part of the process so I just accepted the chaos.
Fortunately Roger is an expert at solving difficult cosmetic problems, but I have to admit that fixing the cracks was an even bigger and messier job than Phase 1. It meant a major disruption to our lives for a few days, but it was part of the process so I just accepted the chaos.
Phase 3 - Painting
Because of the extensive repairs, touching up the paint was impossible and the entire ceiling had to be repainted. That meant the kitchen and family room had to be cleared so that everything could be covered with plastic. Then Baci and the other cats had to inspect the preparations to make sure Roger had done them properly.
 |
| Late that night the kitchen was covered and ready for painting. |
 |
| While Roger prepared the paint, Baci inspected the family room. |
Once the lights over the island were wrapped in plastic, the only light source for this picture was a work light, but you can get an idea of how much covering up had to be done.
The Happy Ending
It took a full day to paint the ceiling, but when all the work was done and the drops and plastic were removed, it looked great. Everything is back to normal now and you can't tell that Roger worked miracles fixing the cracks and the areas around the lights.

There were two long cracks here.

All eight new lights had to be worked on.

Compare this with the "before" picture above.
The Happy Ending
 |
| There were two long cracks here. |
 |
| All eight new lights had to be worked on. |
 |
| Compare this with the "before" picture above. |
 |
| Baci smiles in approval while she calmly waits for the plastic and drops to be removed. |
If you have a project with cosmetic repairs that will require an expert touch, call me at 828-692-4355 and schedule an estimate. Chances are, Roger can work miracles for you too.

You have just done a perfect job in repairing all the cracks! If the cracks can not be repaired well then its just unnecessary to paint the wall. Thank you for showing the whole process with associated images here.
ReplyDelete